
Choosing between PC200-7 and PC300-8 is not simply a matter of selecting the larger excavator. It is a project decision involving production targets, transport limits, fuel use, ground conditions, and attachment requirements. The PC200-7 generally suits medium-scale earthmoving, trenching, road preparation, and confined sites. The PC300-8 offers greater digging force, reach, and bucket capacity for quarry work, deep excavation, and heavy bulk production.
The market context matters. Off-Highway Research reports that excavator demand remains closely linked to infrastructure investment, construction activity, and replacement cycles. GlobalData’s construction equipment outlook also identifies productivity, operating cost, and fleet efficiency as major purchasing factors. These reports do not decide between two used Komatsu models, however. They provide direction, not a final answer. Actual performance depends on machine condition, operator skill, soil density, haul-road distance, and maintenance history.
Field experience often reveals the difference. A PC200-7 may load smaller trucks efficiently and move more easily through narrow urban access. A PC300-8 can reduce excavation cycles when the working face is wide and material is dense. Bigger is not always better. A larger machine may increase transport cost, fuel consumption, and idle time. Komatsu specifications should be checked against the exact machine serial number, attachment, and regional configuration. That detail is easy to miss. This guide compares PC200-7/PC300-8 through practical production, ownership, and site-planning criteria, while acknowledging one uncomfortable truth: published specifications cannot replace a physical inspection and measured jobsite data.
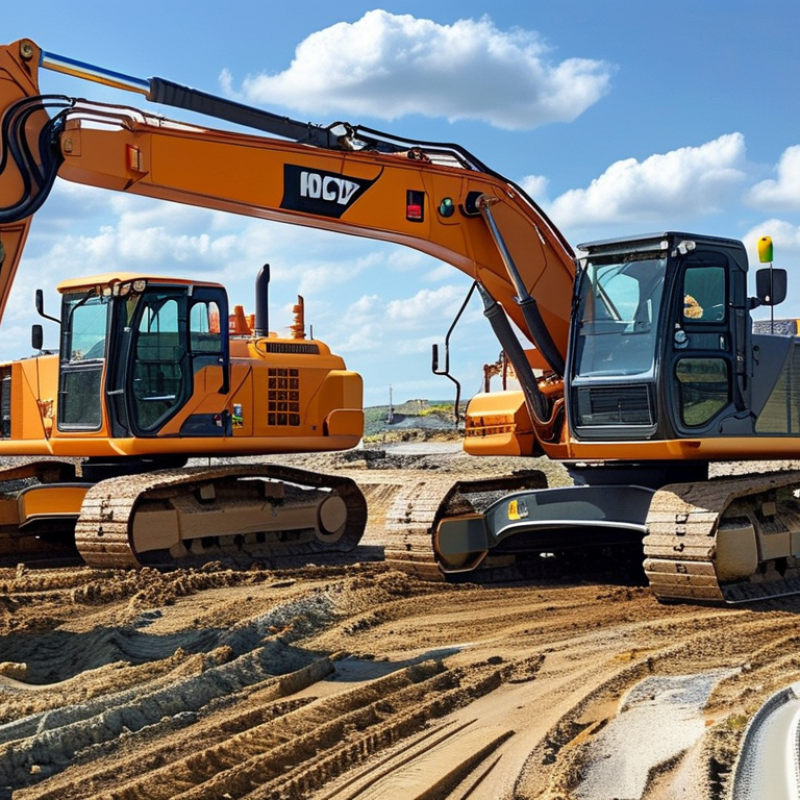
PC200-7 and PC300-8 serve different working priorities. The PC200-7 is typically a 20-ton class excavator, while the PC300-8 belongs to the 30-ton class. This weight gap affects digging force, lifting stability, transport cost, and ground pressure. The PC300-8 usually provides a larger bucket, stronger hydraulic output, and greater reach. It suits quarry work, deep excavation, and heavy loading cycles. The PC200-7 is easier to move between sites and often fits narrower access roads. Its smaller footprint can reduce preparation work around urban projects.
Their designs also feel different during operation. The PC200-7 emphasizes practical balance and moderate fuel demand. The PC300-8 uses a heavier upper structure and undercarriage for demanding loads. Cabin visibility, control layout, cooling performance, and maintenance access deserve close inspection.
Specifications can vary by region, attachments, and machine condition. Do not trust a brochure alone. A worn hydraulic pump can erase the advantage of a larger model. I have seen projects choose capacity first, then struggle with transport limits.
Tips: Match the bucket to your soil. Check haul-road width, lift charts, fuel records, and local service support. Test swing smoothness and hydraulic response before purchase. Also compare hourly output, not only purchase price. The bigger excavator may finish faster, but only when trucks and operators can keep pace. That assumption often fails.
How to Choose PC200-7 or PC300-8 for Your Project?
Project Requirements: Matching Excavator Size to Work Conditions
Choosing between a 200-class and 300-class excavator starts with the ground, not the catalog. A 200-class machine often suits urban foundations, drainage trenches, and narrow access roads. Its smaller working radius can reduce damage near walls, buried utilities, and traffic routes. A 300-class excavator provides greater digging force, reach, and bucket capacity. It fits quarry work, deep excavation, heavy rock removal, and large earthmoving areas.
Measure the actual work zone before selecting equipment. Check trench depth, required reach, soil density, slope stability, and daily material volume. Soft ground may reject a heavier machine, even when its power looks attractive. Timber mats or temporary access roads can help, but they add cost and setup time. I once treated a short haul distance as a minor detail. It was not. Repeated repositioning reduced production more than expected.
Bucket size also changes the decision. A large bucket may load trucks quickly, but it can overload the machine on compacted clay or fractured rock. Review hydraulic performance, counterweight stability, transport limits, and fuel use with the operator. Speak with someone who has worked on similar ground. Their practical warning may be more valuable than a neat spreadsheet. Leave room for uncertainty. Soil conditions often change within a few meters.
Use the comparison below to match machine size with excavation depth, material, access conditions, lifting needs, transport limits, and expected productivity.
| Project Requirement | 20-Ton Excavator Class | 30-Ton Excavator Class | Recommended Choice | Reasoning |
|---|---|---|---|---|
| Typical operating weight | Approximately 19–22 tonnes | Approximately 28–32 tonnes | Choose according to ground pressure, transport capacity, and working-space limits. | A heavier machine generally provides greater stability and breakout performance but increases hauling and site-access requirements. |
| Engine power range | Approximately 95–125 kW | Approximately 145–185 kW | 20-ton: routine excavation30-ton: heavy production | Higher power helps maintain productivity in hard soil, deep excavation, and continuous high-load applications. |
| Maximum digging depth | Approximately 6.5–7.0 m with a standard digging arm | Approximately 7.0–7.8 m with a standard digging arm | Use the 30-ton class when the required depth is near the upper limit of the 20-ton class. | Actual depth depends on arm length, bucket geometry, track position, and the required working clearance. |
| Maximum reach at ground level | Approximately 9.5–10.5 m | Approximately 10.5–11.5 m | 20-ton for compact sites; 30-ton for wider trenches and larger working envelopes. | Greater reach can reduce machine repositioning, particularly on road, drainage, and quarry projects. |
| Bucket capacity range | Approximately 0.75–1.20 m³ | Approximately 1.20–1.80 m³ | 20-ton: mixed soil, utility work, general digging 30-ton: high-volume earthmoving and dense material | Bucket size should be matched to material density, truck payload, hydraulic capacity, and safe lifting limits. |
| Suitable soil and material | Soft to medium soil, clay, sand, gravel, and moderately compacted fill | Medium to hard soil, dense gravel, compacted fill, and heavy excavation with suitable attachments | Use the larger class for sustained work in dense or difficult ground. | For solid rock or heavily cemented material, attachment selection and production targets are more important than excavator size alone. |
| Trench and utility work | Excellent for urban utilities, drainage, foundations, and general site preparation | Effective for large-diameter pipelines, deep corridors, and long open trenches | 20-ton class for restricted access and frequent repositioning. | The smaller footprint normally provides better maneuverability and lower risk of damaging nearby roads, structures, or services. |
| Bulk earthmoving productivity | Moderate production with lower fuel and transport demand | Higher production per cycle and better suitability for large truck fleets | 30-ton class when daily volume and schedule pressure are high. | Large-scale sites can benefit from bigger buckets and stronger hydraulics, provided trucks and haul roads can support the output. |
| Lifting and loading work | Suitable for moderate pipe, culvert, and structural-component handling within rated limits | Better stability for heavier lifts and longer working radii within rated limits | 30-ton class for frequent heavy lifting; 20-ton class for lighter, occasional lifts. | Never select by operating weight alone. Check the rated lift chart, radius, boom configuration, ground condition, and lifting accessories. |
| Restricted or urban access | Usually easier to position on narrow roads and compact work areas | Requires more room for swing clearance, transport, and ground bearing | 20-ton class for tight sites, city work, and projects with limited entry routes. | Measure gate width, road capacity, overhead clearance, swing radius, and allowable ground pressure before mobilization. |
| Transport requirements | Typically easier to move with a standard heavy equipment trailer, subject to local regulations | Usually requires a higher-capacity trailer, route planning, and possible permit review | Choose the smallest class that meets production requirements if transport cost is a major concern. | Total transport weight includes attachments, fuel, accessories, trailer capacity, and applicable legal axle-load limits. |
| Ground bearing and site impact | Generally lower ground pressure and reduced risk on prepared but sensitive surfaces | Higher ground pressure; may require mats, improved access roads, or stronger working platforms | 20-ton class on weak or finished surfaces unless the site is properly reinforced. | Ground conditions should be reviewed by the site team, especially near excavations, buried services, slopes, and temporary platforms. |
| Fuel and operating cost | Typically lower fuel use per operating hour and lower mobilization cost | Typically higher fuel consumption and operating cost, offset by greater output | Compare cost per cubic metre moved, not fuel cost per hour alone. | A larger excavator may be more economical when it significantly reduces cycle time, truck waiting, or project duration. |
| Best-fit project profile | Urban construction, utility installation, residential foundations, landscaping, road maintenance, and medium-scale earthworks | Large foundations, major roadworks, quarry support, bulk excavation, large drainage systems, and heavy civil construction | Select 20-ton for versatility and access; select 30-ton for output and heavy-duty capacity. | The best choice balances production, access, transport, safety, attachment compatibility, and total cost of ownership. |
| Decision rule | Choose when the machine can complete the deepest, heaviest, and highest-volume task with a practical safety margin. | Choose when the 20-ton class would require excessive cycle time, undersized buckets, or repeated repositioning. | Prioritize project constraints before maximum machine capacity. | Confirm the final selection using the manufacturer’s current specifications, rated lift charts, local transport rules, and a site-specific production estimate. |
Planning note: The figures shown are representative industry ranges for common crawler excavator classes, not a specification for a particular machine. Actual performance varies with configuration, attachment, material density, operator technique, maintenance condition, altitude, and site layout.
Choosing PC200-7 or PC300-8 depends on the work pattern, not only operating weight. PC200-7 fits trenching, utility installation, and confined urban sites. PC300-8 offers greater reach, bucket capacity, and lifting stability for large excavation. However, the larger machine needs wider access roads and firmer ground. The U.S. EPA NONROAD model evaluates equipment fuel demand through rated power, load factor, and operating hours. These factors matter more than advertised horsepower. A smaller excavator can outperform a larger one when trucks arrive slowly.
Long idling can quietly erase productivity gains. U.S. EPA nonroad guidance identifies idle reduction as a practical method for lowering diesel consumption. Record litres used, completed cycles, material density, and idle minutes for at least two weeks. Field records are often messier than spreadsheets. That is useful. They expose waiting time, poor loading angles, and unsuitable buckets. The correct comparison may show lower hourly fuel use but higher fuel per cubic metre.
Check auxiliary hydraulic flow, pressure, return-line requirements, coupler dimensions, and counterweight limits. PC300-8 may handle larger breakers, rippers, or lifting attachments more effectively. PC200-7 may provide better control with compact breakers and grading buckets. ISO 10567 requires rated lift capacity to account for hydraulic and stability limits. Do not rely on a catalogue match alone. Test the attachment under real material conditions. A slightly slower machine may prove cheaper when it reduces rehandling and transport delays.
Choosing between the PC200-7 and PC300-8 depends on more than digging force. Ownership cost can change significantly with fuel use, transport, and attachment demands. A PC300-8 may move more material per hour, but its larger fuel tank, undercarriage, and transport requirements increase daily expenses. The PC200-7 usually costs less to move between sites. It can also suit narrower access roads and smaller work areas.
Maintenance planning deserves close attention. Check service records, hydraulic oil condition, swing bearing play, track shoe wear, and engine blow-by before purchase. On a used PC200-7, worn hoses can create small leaks that become expensive during heavy production. The PC300-8 needs more workshop space and stronger lifting equipment for some repairs. Keep filters, seals, and common hoses in stock. Downtime is rarely cheap.
Availability can outweigh a lower purchase price. A machine sitting idle for three days may lose more money than a modestly higher rental rate. Ask local suppliers about parts delivery times, trained technicians, and backup machines. I once underestimated transport delays on a larger excavator; the project lost two working shifts. That mistake changed my inspection process. Compare expected monthly hours, fuel consumption, repair history, and replacement access using real site data. Paper estimates often look too clean.
Choosing PC200-7 or PC300-8 should begin with the worksite, not the machine’s appearance. Measure digging depth, working radius, soil hardness, access width, and daily output. A PC200-7 often suits medium excavation, road maintenance, and restricted sites. Its smaller footprint may reduce transport difficulty and ground pressure. The PC300-8 offers greater operating weight, bucket capacity, and lifting stability. It can be more productive on large earthmoving projects, especially where trucks wait nearby.
Check the attachment and material requirements carefully. A heavy breaker, large bucket, or frequent deep digging can change the decision. Compare rated lift capacity at the actual working radius, not only the advertised maximum. Review fuel use, maintenance history, hydraulic condition, undercarriage wear, and parts availability. Ask for inspection records and verify specifications against reliable technical documents. I once underestimated travel time between work zones; the smaller machine then lost much of its expected advantage. Real site movement matters.
Tips: Mark the work area with stakes before choosing. Test both models on similar soil when possible. Estimate tons moved per hour, not bucket size alone. Leave room for rain, operator learning, and unexpected repairs. If the project schedule is tight, calculate backup-machine access and transport costs. A cheaper purchase can become expensive when downtime, oversized hauling, or unsuitable attachments enter the calculation. Recheck your assumptions with an experienced operator and a qualified technician. Details decide.
Northeast Battery, a Stored Energy Holdings, Inc. Company